
Disclosure: This blog post contains affiliate links. As an affiliate and Amazon Associate, I earn from qualifying purchases at no additional cost to you. Please read my full disclosure policy for more information.
With so much to focus on as a parent, it’s easy to take your child’s vision for granted. It’s easy to assume our kids’ vision is fine as long as they aren’t complaining or having obvious visual difficulties.
But vision problems often emerge in early childhood, especially when kids enter preschool or Kindergarten. They may have trouble seeing the board at school. Or, they struggle to see the difference between letters and numbers. Your child’s teacher may report that your child is squinting, rubbing their eyes, or seems distracted.
Of course, you will need to make an appointment with your optometrist or pediatric ophthalmologist. But, it’s important to be aware of a vision condition affecting the eyesight of up to 3% of all children — amblyopia or lazy eye.
What is Amblyopia or Lazy Eye?
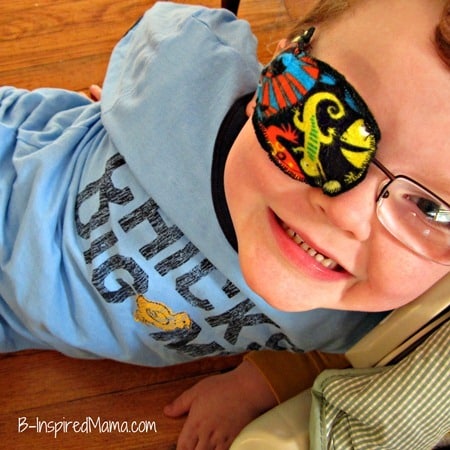
My son Sawyer has been wearing corrective eyewear since he was a toddler. But it wasn’t until he was in preschool that he was diagnosed with amblyopia, commonly known as “lazy eye.”
According to Medical News Today, “A child with amblyopia will not be able to focus properly with one of their eyes. The other eye will make up for the problem, so much so that the affected eye suffers as a result. The eye with impaired vision will not receive clear images. The brain will not receive clear data and will eventually start to ignore it. In many cases, the brain and the stronger eye make up for the shortfall so well that the child does not notice they have a problem. That is why a lazy eye is often only diagnosed when the child has a routine eye test.”
We honestly weren’t surprised by our child’s amblyopia diagnosis given his regular vision screenings and need for corrective lenses since toddlerhood. And we didn’t have to wonder about the cause of his lazy eye condition either. We have a family history: both his father and myself have amblyopia. But, we weren’t prepared for the challenge of tackling lazy eye vision therapy and eye patching with a preschooler.
Fixing Lazy Eye with an Eye Patch
Sawyer’s pediatric ophthalmologist prescribed occlusion therapy for his amblyopia. Occlusion therapy, also known as eye patching, is one of the most common vision therapies to treat lazy eye.
If you’re here, you or your child has probably been prescribed occlusion therapy, too. In occlusion therapy, the child wears a patch over their stronger eye for a certain amount of time each day. With the dominant eye covered by the eyepatch, the brain is forced to rely on the child’s weak eye. This helps to strengthen and retrain the muscles in the weaker eye and can correct eye alignment and double vision over time, too.
The amount of time a child needs to wear an eye patch depends on the severity of the child’s amblyopia and should be determined by their eye doctor. We were grateful that Sawyer only needed two hours per day.
When I was a kid, my eye doctor prescribed eye patching for the entire school day. I remember my mom clipping an awkward and ugly black plastic eyepatch on my glasses each morning before putting me on the bus. And I remember taking that patch off as soon as the bus pulled out of my mom’s sight.
I know my mom isn’t the only parent or caregiver to struggle with their kids’ compliance in wearing their eye patch. I know from experience, wearing an eye patch makes kids feel anxious and self-conscious. Most eye patches available in stores are ugly or at the very least boring. And eye patching can cause uncomfortable side effects and physical symptoms like headaches and fatigue.
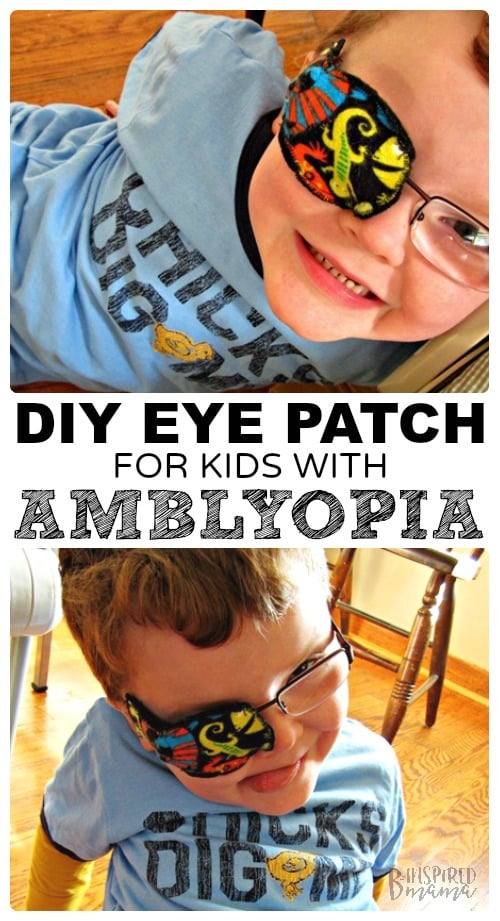
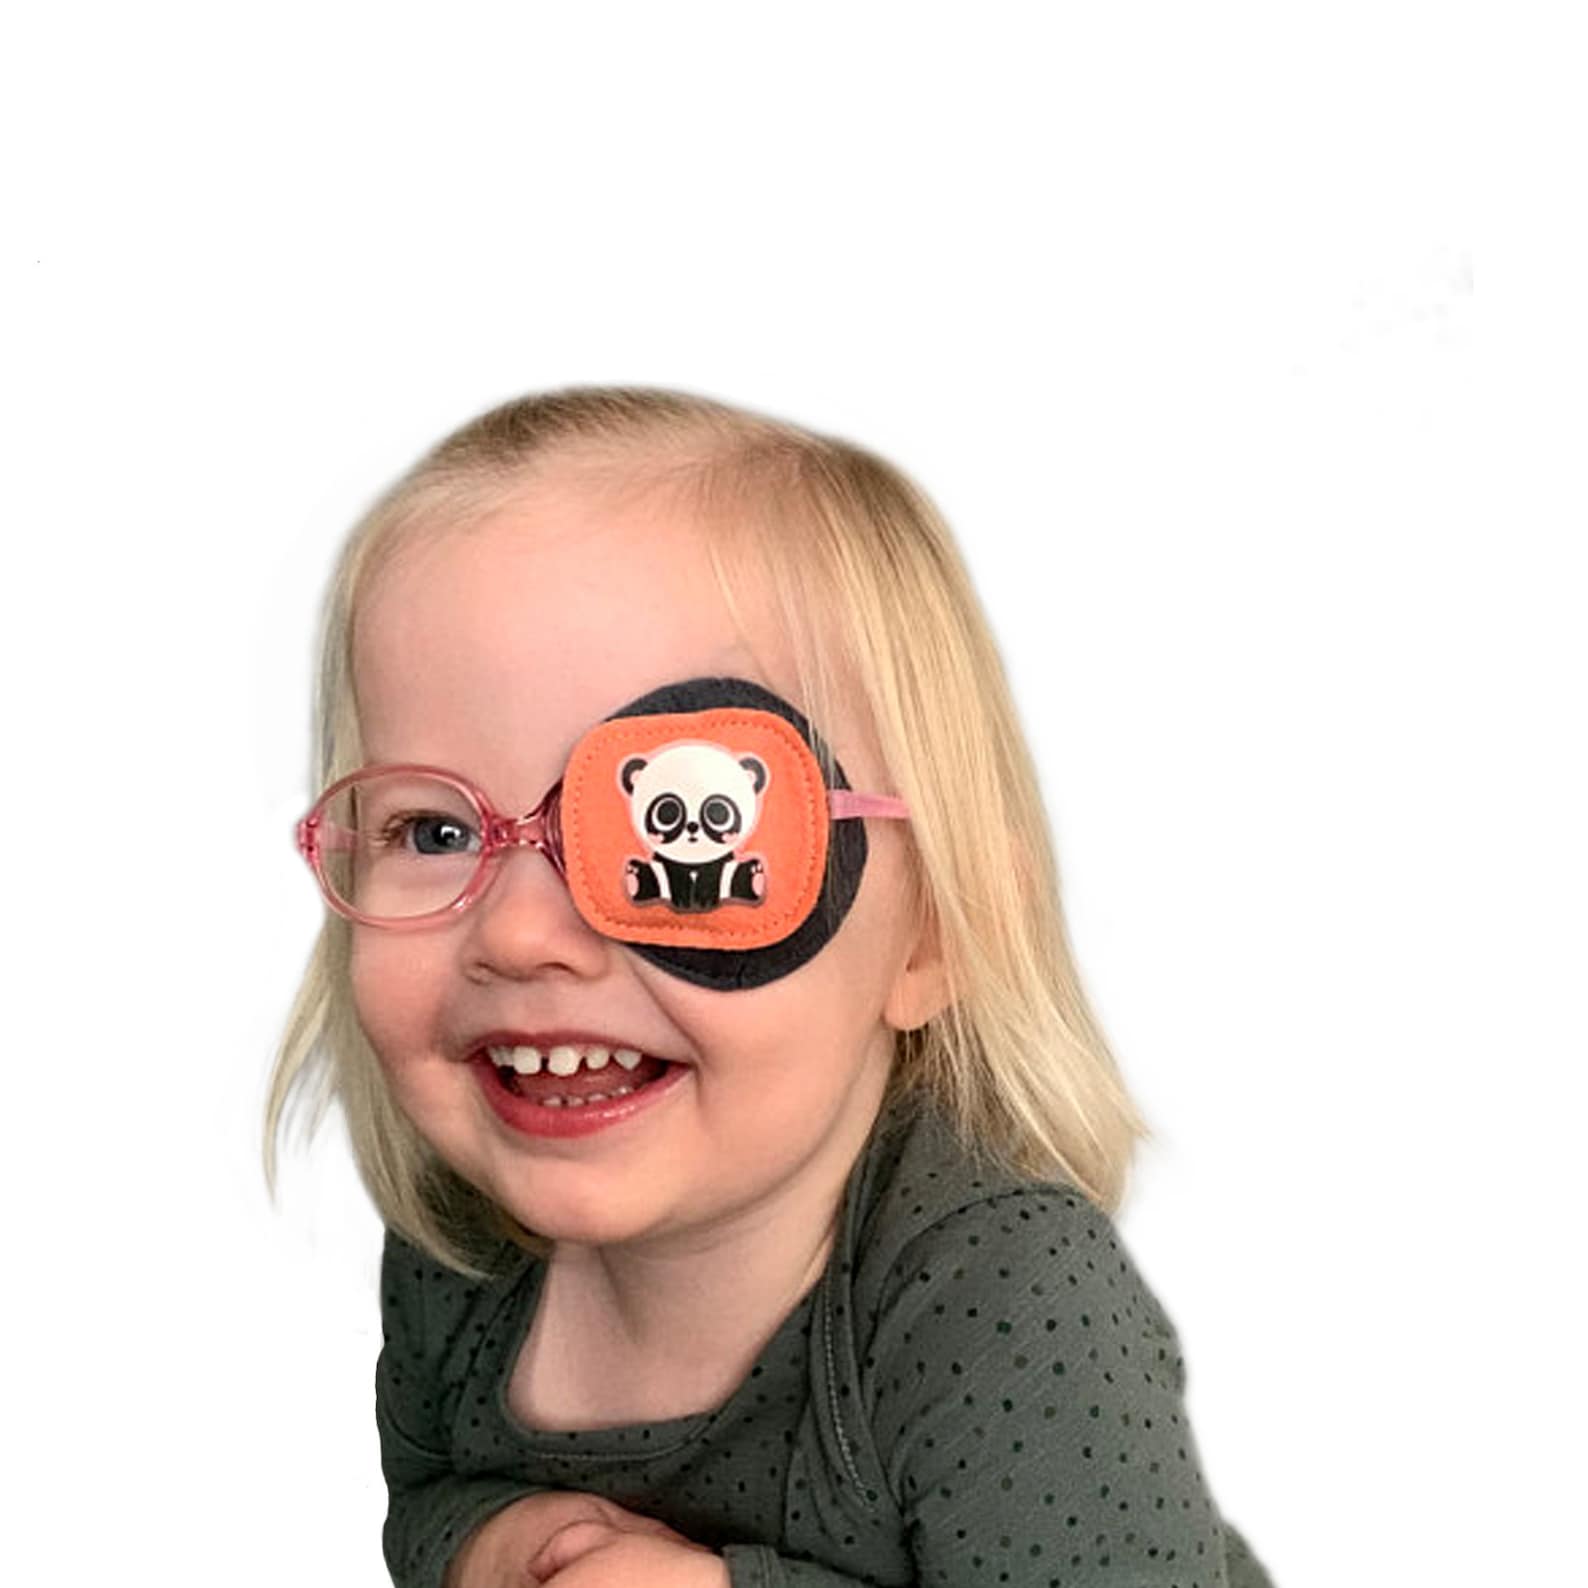
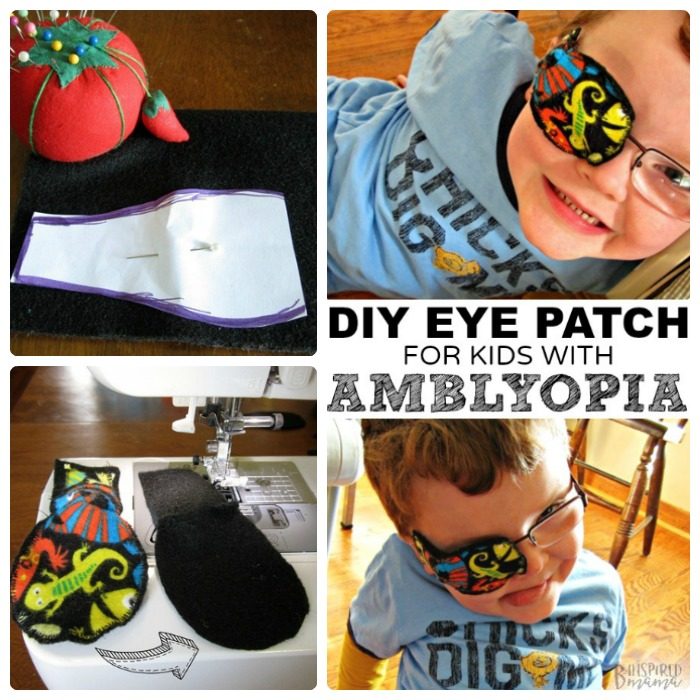
So, when I learned Sawyer needed to wear an eye patch for lazy eye, I set out on a mission to make a DIY eyepatch that was more comfortable to wear and maybe even fun to wear. Here’s what I came up with and how to make eye patch for glasses for your child…
How to Make a DIY Eye Patch for Glasses
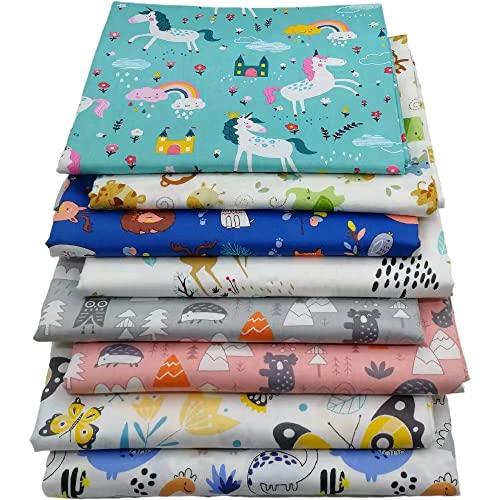
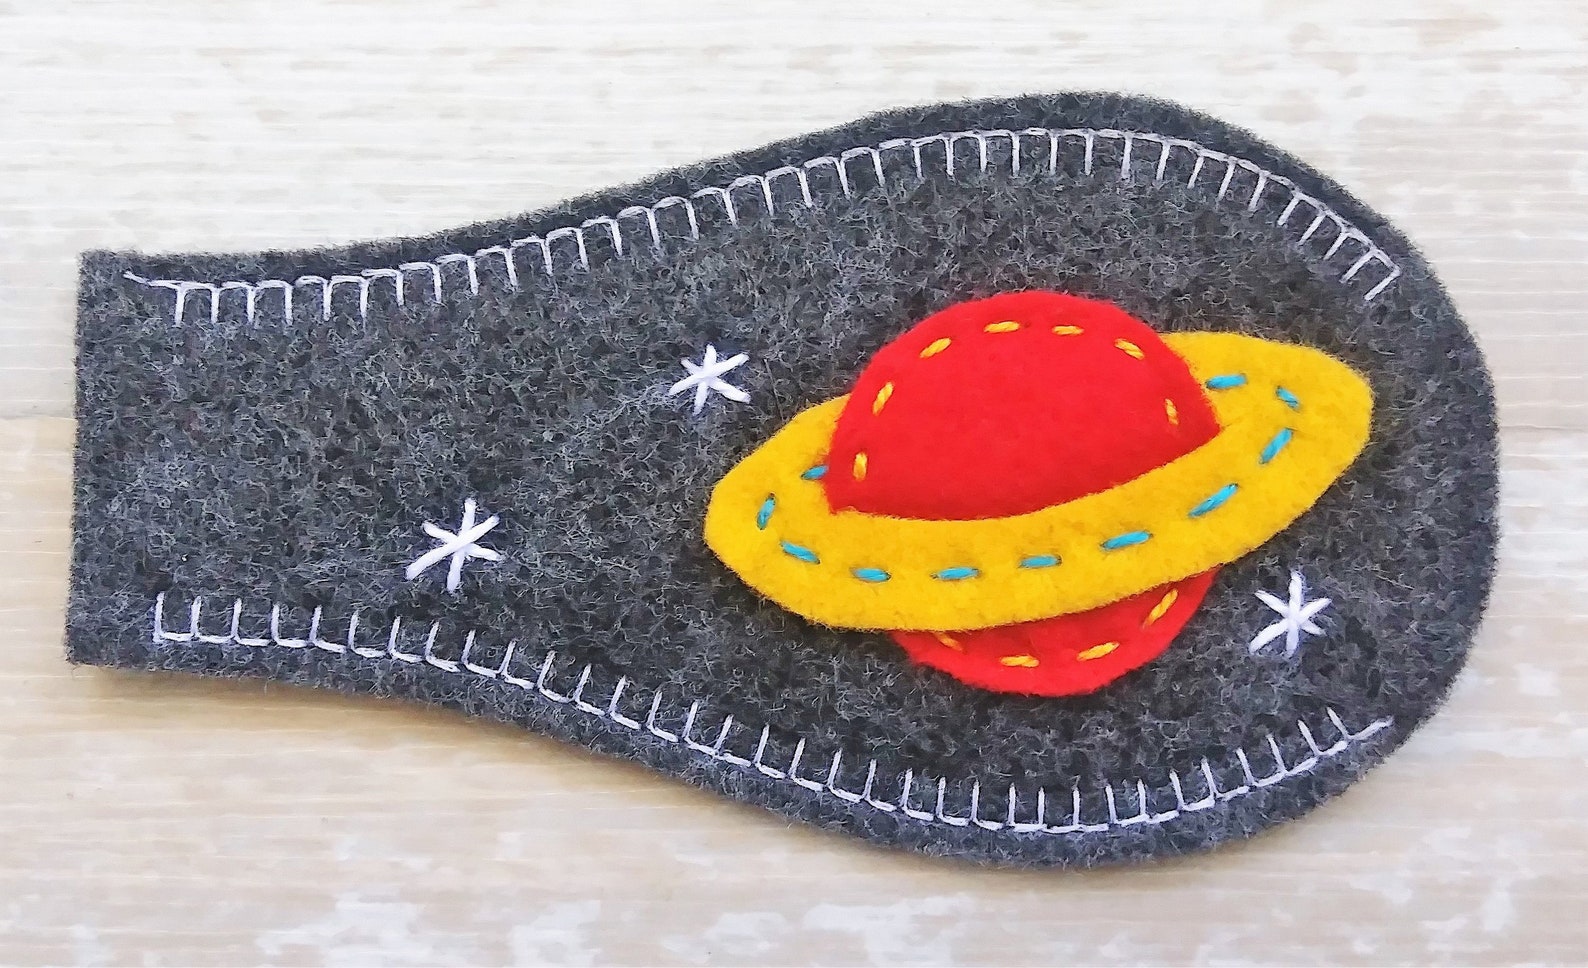
With some basic sewing skills (either with a sewing machine or needle and thread), you can sew a fabric patch that slides right onto your child’s glasses. The soft cloth patch is more comfortable than different type of patches, especially adhesive patches that can cause skin irritation. And, you can use fabric prints according to your child’s interests, like dinosaurs, unicorns, or their favorite cartoon character. You can even take them shopping to pick out there own fabric, which gives them some sense of control over their new eye patch treatment and may even get them excited to wear their new special eye patch on their glasses.

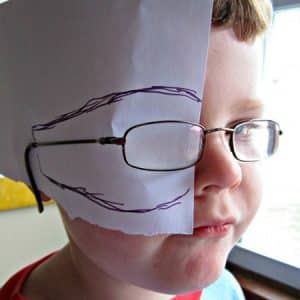
After you’ve chosen your felt and fabric, you can have your child help you create the paper template for their DIY eyepatch. Simply have them hold a piece of paper over their eye (the eye needing patching) and the side of their face, back to their ear. Then carefully position their glasses on their face, over the paper. With the eyeglasses positioned over the paper, loosely trace the lense and arm of the glasses, leaving about 1/2-inch to 1-inch border.
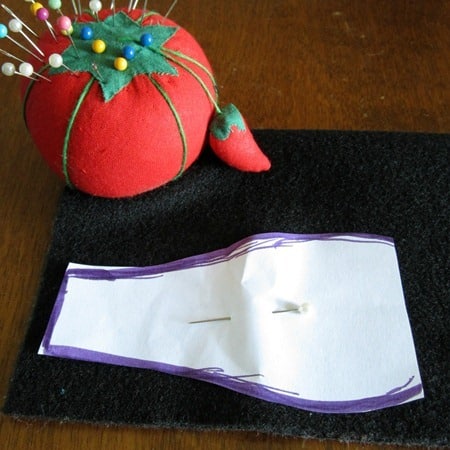
Cut this glasses patch shape out of the paper. Then use it as a paper eye patch template to cut two pieces out of felt and one piece out of fabric.

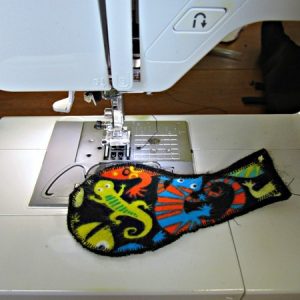
Trim the fabric piece about 1/4-inch smaller than the felt pieces. Then, place the fabric piece on top of one felt piece (right-side up) and sew a zigzag stitch around the edges.
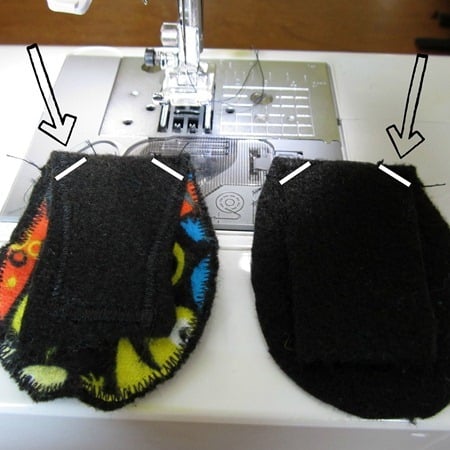
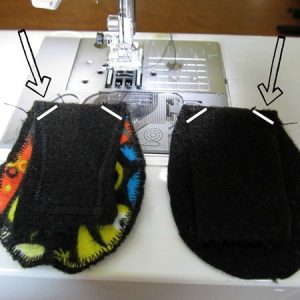
Fold this fabric-and-felt piece in half, right-sides together, where the eyeglasses hinge would be. Then, about 1/4-inch in across each corner. Repeat with the other piece of felt.
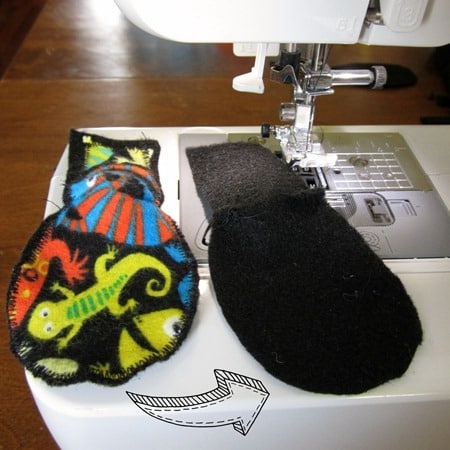
Finally, sandwich these two eyepatch pieces together, sewn-corners together, and stitch along the top and bottom, leaving each end open so it can be slided onto the eyeglasses arm and lens.
That’s it! That’s all it takes to make a DIY eye patch for glasses.
How to Wear Your DIY Eyepatch
This cloth patch is made to slide right onto the arm and lens of your child’s eyeglasses. The corner pleats allow it to curve around the glasses’ hinge. The way it slides onto the glasses makes patch removal harder for young children. And if they can’t take it off, they can’t lose it!
As far as how long to wear your DIY eye patch for glasses, always follow the guidelines of your child’s eye doctor or optometrist.
DIY Eye Patch for Lazy Eye Tutorial:

Kids DIY Eye Patch for Lazy Eye
Tools
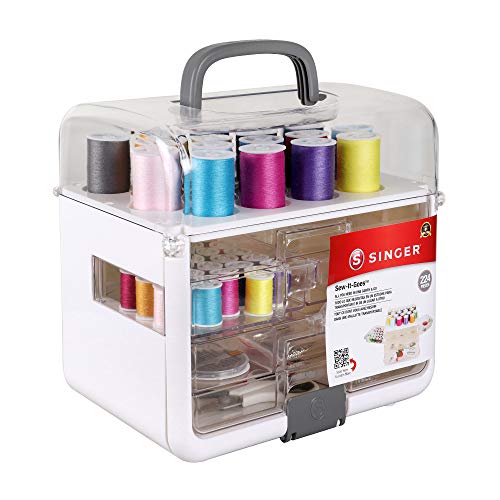
- sewing machine (or hand-sewing needle)
Materials
- copy paper (1 sheet)
- washable markers
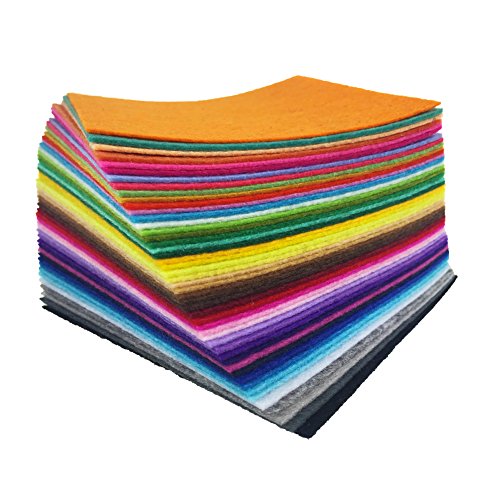
- felt
- fabric (around 1/4 yard; small prints work best)
- sewing thread (for sewing machine or hand-sewing)
Steps
- With child wearing eyeglasses, carefully position a piece of copy paper behind affected lens and arm/temple (from nose to ear). Then use one of the washable markers to trace a simplified patch shape around lens and arm/temple.

- Cut on traced line, then use paper shape as a template by pinning it onto felt and cutting around it. Repeat to cut another matching shape out of felt and one more out of fabric.
- Trim around 1/4-inch off edges of fabric shape to make it slightly smaller than felt shapes.
- Place fabric shape right-side-up on one of the felt shapes and use sewing machine (or needle and sewing thread) to stitch along edges using zigzag stitch or blanket stitch.
- Fold this fabric/felt shape at approximate location of eyeglasses hinge, fabric-side inside fold, then sew across each corner about 1/4-inch in. Repeat with other felt shape.
- Position fabric/felt shape on top of felt shape with all sewn corners facing one another. Straight-stitch 1/4-inch in along top and bottom edges.
- Slide eye patch onto arm/temple and lens of eyeglasses.


Notes
DIY Eye Patch Tips and Tricks
A couple of tips to help ensure your child will actually want to wear their new homemade eye patch…- Choose a fabric print in your child’s favorite theme (e.g., trucks, dinosaurs, Disney) or let your child choose their fabric themselves.
- Make several eye patches at once while you’ve got the supplies out and you’re in the groove; you’ll want backups in case any get misplaced.
- Make various eye patches in different fabric patterns/colors to give your child a choice and feeling of empowerment.
- Use fabric scraps to sew a small eye patch onto your child’s favorite doll or stuffed animal.
DIY Eye Patch Materials and Tools on Amazon:
You can get all of the supplies and tools you need to make a homemade eyepatch right from Amazon. Check it out…
8pcs Precut Fat Quarters Cotton Fabric Bundleflic-flac 8 x 12 inches Assorted Color Felt SheetsSINGER Making The Cut Sewing MachineSinger Sew-It-Goes 224 Piece Sewing Kit

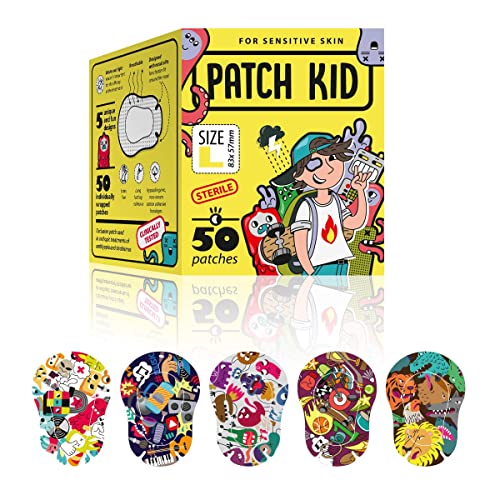
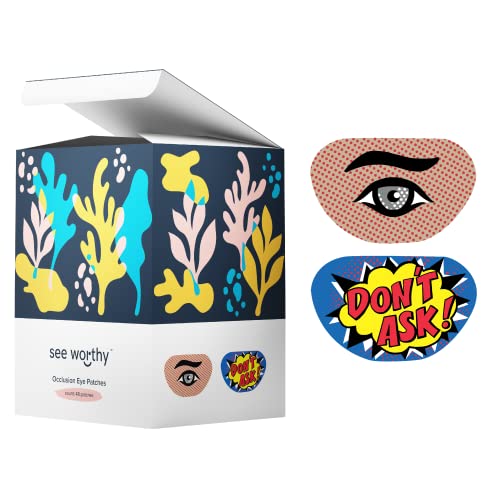
Eye Patches for Lazy Eye from Etsy Sellers or Amazon:
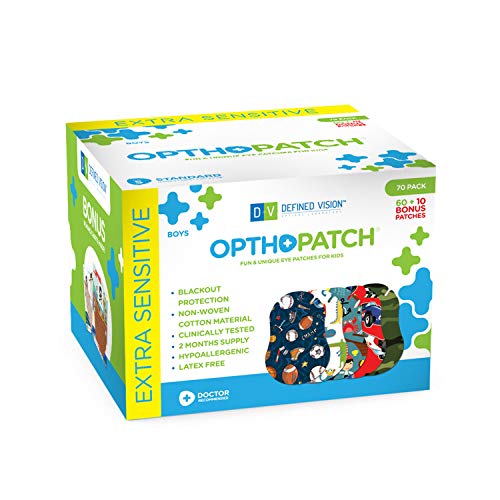
No time to make your own DIY eyepatch? Check out these kids eyepatches you can purchase on Amazon…
THSIREE 4 Pack Eye Patches for Kids GlassesOpthopatch Kids Eye PatchesHide & See Kids Eye PatchesKids Custom Panda Eye Patch for EyeglassesPatch Kid Eye PatchesKids Planet Eye Patch for GlassesSee Worthy Pop Art Eye Patches for KidsKids Minecraft Poggle Eye Patch


Find this DIY Eyepatch Tutorial Helpful? Save It & Share It!
Don’t forget to save this DIY eyepatch tutorial to come back to. And share it with friends! Simply use the buttons at the top or bottom of this post. Or, click on: Share on Facebook | Tweet It | Pin It | Email to a Friend
Helpful Resources on Children’s Eye Patching for Lazy Eye:
More Parenting Tips from B-Inspired Mama:
- When Your Child Needs Glasses — Tricks from a Seasoned Mom
- The Benefits of Kids Vision Care
- 5 Simple but FUN Ways to Ensure Healthy Kids
Lindsay says
Thank you so so much! My 6yo needs to patch a little bit daily (for 6 months then we’ll see 🤞🏼) and your patch idea has been such a blessing! He got to pick out the fabric and doesn’t fight to patch. It’s also less wasteful than traditional patches which we love. And since we’ve picked from scrap fabric it hasn’t cost us anything.
Krissy of B-Inspired Mama says
I love hearing this! Thanks for sharing and best of luck with your little guy’s vision.
Sherri says
Thank you! My daughter is finishing up eye patching but I didn’t want to buy more eye patches. Plus, she hates the adhesive ones. This was super quick to make, and she loves it.
Nimesh says
Thanks it was very helpful but still to create my own can you please share video for reference.
Krissy of B-Inspired Mama says
I’m sorry; I don’t have a video and made these years ago when my son was just a little guy. Good luck!
Tiffa y says
I want to say how much I appreciated this article. My son has to be patched for 4 hours a day. And he hated the only one i could find in town. I let him pick a bunch of fabric yesterday. He loves his new patches and is way more comfortable now. Thank you!
Krissy of B-Inspired Mama says
Yay! I’m so so glad this helped you and your son! Thanks for the positive feedback.
Cris says
God bless you! Thanks a lot for such a great idea. I’m already doing one for my little one. Kisses from Spain!
Krissy of B-Inspired Mama says
Oh, yay! So glad it helps. Thanks for the positive feedback.
Jamie says
Thank you for this pattern! I found it on a Pinterest and immediately made one for my son! He only needs the patch a little every day at this point, but I can already tell this patch is going to be such an improvement! And I LOVE that I can use fabric scraps from other projects to personalize it for him! THANK YOU!
Krissy @ B-Inspired Mama says
Oh, this makes me SO happy to hear it will help you and your son get through patching (even if almost done – hopefully!) a bit better. Thank you for sharing with me!
Annette says
Thanks so much for this EASY pattern!! I’ve made one already and now I want to make others to match all her outfits 🙂
Krissy @ B-Inspired Mama says
Oh it makes my day when I hear that this was helpful for another mama!
Brittney Bodine says
Thank you SO MUCH!
Krissy @ B-Inspired Mama says
You’re so welcome! Glad to be of help.
Babrenar says
Wow this is really great am going to try it out
Krissy @ B-Inspired Mama says
Hope it helps!
Brooke says
I know its been a while since you posted this but I must ask, did you have any issues with his glasses slipping down and him being able to find some “peek a boo” spots?? I asked my daughter’s eye doc about making her one but that was his concern is that her glasses would slip down and she would be able to see around it. just thought I would ask before I get the stuff to make. thanks!
Krissy @ B-Inspired Mama says
My son was (and still is) notorious for having his glasses at the end of his nose. But the patch is big enough around the glasses that it didn’t seem to be a problem for him at the time. I can’t promise, though, I guess.
Shannon says
Thank you so much for sharing this!! My 6 year old has a lazy eye…had surgery a couple years ago and now we have to patch again for 2 hours a day! Its such a challenge…even getting him to keep his glasses on is a challenge…Im going to make this and hope it helps…he loves the pictures! I will keep you posted!!
Krissy @ B-Inspired Mama says
Oh – this just made my day! I hope it helps him. Let me know if you have a questions!
ali says
JUST WHAT I NEEDED THANK YOU
Scotty says
Begin making progress now in your efforts to lose weight. If you are on a low fat diet, and fighting to achieve desired weight loss results,
then it is certain you need to apprehend your diet by making changes that would work for you.
Is there a diet out there that will really work.
Missy says
Thanks Krissy for a wonderful idea! My daughter likes this so much better than the adhesive patches
Robin says
Thank you for sharing your tutorial. With just some scraps around the house, I was able to make something my daughter loves…well, as much as you can love something you’d rather not wear.
Krissy @ B-Inspired Mama says
Oh, I’m so glad it helped, Robin!
Cris says
I love this idea. It seems simple enough… but I am not crafty at all. I will do my best! Thanks for the tutorial!
Krissy @ B-Inspired Mama says
It’s not hard at all. I hope it helps! 🙂
Tara says
I just used your tutorial to make a patch for my son. Thank you!!
Krissy @ B-Inspired Mama says
Oh, I’m so glad that it’s helping others!!
Amber says
I have a 4 month that doesn’t wear glasses yet but need to patch 2 hours a day, he gets a rash from sticky patch. Is there a way of adapting this for no glasses?
Gyen says
Maybe stitch some soft elastic to the ends like a headband? I did that for the fake patch I made my three year old. She wanted to match her brother, but her eyesight is fine! Since she doesn’t have glasses, we used elastic to hold it on.
Krissy @ B-Inspired Mama says
Yes, I would agree with Gyen, to add some soft elastic to it that could go around his head. Good luck, Mama!
Tina says
I just want to thank you so very very much for this post!!! My 6 year old was diagnosed with Amblyopia over a year ago. Your page was sent to me by a friend a few months later (sometime last summer) when the doctor said we had to patch. I immediately began making your patches and they have been a huge success. Not only is my daughter more compliant with patching because she gets to pick which patterns she likes, they are so cheap and easy to make that we always have several kicking around (in the car, in my purse, in her backpack etc etc). I have also been stopped in public on a few occasions by moms fed up with bandage patches and pirate patches asking how to make them.
We had a follow up appointment last week and the doctor explained to me that my daughter’s eye has improved from a .575 to a .475 (I don’t know what the numbers mean myself, but it is a huge improvement). She now gets a new prescription and the doctor figures 3-6 more months and we will be patch free. I truly do owe thanks to you. If it weren’t for these patches, I don’t think this would have been as easy as it has been, so THANK YOU! 🙂
Krissy @ B-InspiredMama says
Oh my gosh – this just about brought tears to my eyes! This was just my little way to make things easier for my kiddo and I. I never could have imagined that i could help others, but I’m thrilled! I’m so glad to hear that it’s helping you and your daughter. We only ended up having to patch for about 8 months, so they helped us, too. I hope you’re patch-free soon! Thanks so much for stopping in and supporting me. 🙂
Deborah Gilbert says
hi, my daughter was just diagnosed with amblyopia today. No surprise, I have it and just like you I always took my horrid black patch off as soon as I could (and my right eye is terrible because of it). So, my almost 3 year old needs a patch and I might just have to make her one like this. Thanks for the tutorial.
Krissy @ B-InspiredMama says
You’re welcome. I hope it helps your little one as much as it did mine! We no longer need to patch after about 9 months of it. Good luck, Mama!
jenney says
I am so going to make one of these for my four and a half year old. He wants to look like a pirate, so I think I’ll just use black fabric but make a cute (?) skull and crossbones out of felt to go on top. He absolutely HATES wearing a patch because then he can’t see, so I’m hoping to make it more fun for him. Thanks for the directions!
Deb says
My 3 yr old has to patch. She has been for at least 6 months, just had eye surgery on both eyes (I thought we were done patching, but not yet.) She started hating the sticky patch just before her surgery so I don’t want to go back. A quick question how big of space do you leave for the nose piece so that it still seals on the top?? I might just have to try and mess up a few times, i’m not a big sewer… Did you ever try a flannel fabric against the eye? Or is there different types of felt. Thanks
Krissy @ B-InspiredMama says
So sorry you and your little one have to go through this! I hope a handmade patch helps her. I used felt because it has a bit more structure than flannel. The texture didn’t seem to bother my little guy. And the felt was soft enough to just sort of sit up against the nose piece. I didn’t cut out any special area for it. I hope this helps. If need any more help feel free to use my contact form (where it says contact in the top menu bar) to email me directly. Good luck, Mama!
Ana says
Hi, found this pattern through Pinterest – my daughter has the same problem, and hates the sticky patch – just made one, following your tutorial, and she loved. Thanks you so much! 🙂
Kathleen Waltman says
awesome!! Quick ?
Do you think it matters if the patch sits on top of the lens or against the skin?? Great Idea! you ROCK :0)
~Nikki Pullen says
I LOVE IT!!! You have now inspired me to make a new one for my son : )
Anonymous says
I just read this & I'm going to try making my own patches. I suffer from double vision & extreme sensitivity to light in one eye & now have to wear a patch permanently. I started out wearing the adhesive ones which I really hated. I've now got a couple of leather ones which look nice but they're still pretty uncomfortable to wear all the time. A felt patch should let more air through- the worst thing about wearing a patch for me is never feeling fresh air around my eye & the constant hot, sticky feeling underneath. Plus I'll get a chance to try out a few of my own designs.
Lisa
Anonymous says
Wish somebody's made me one 50 years ago! Mine was beige plastic & sometimes just white gauze & tape. Oh yeah, & a pair of glasses with one side covered.
Krissy Sherman Bonning says
White gauze and tape?! That must have been so uncomfortable!
Joy Burkhart says
What a cutie! I'm so sorry that he has to go thru what I did as a child. My eyepatch was black on the inside and flesh colored outside, clipping to the inside of my glasses. (This was back in 1958-60)Like Natalie, I wish my mom had made something like this for me! Give Sawyer a big hug for me! 🙂
xoxo
Joy
Krissy Sherman Bonning says
Thanks for the warm words. Mine was a hard plastic one of course. Can't believe how unappealing they are for kids.
Alexa says
I'm totally sending this on to my adult friend in need of an eye patch!
Krissy Sherman Bonning says
Oh, great! Thanks, Alexa. I hope it helps.
Natalie says
Aw! This is adorable, and so is the little guy 🙂 I wish my mom were that clever when I was little and had to do the eye patch. My best friend's daughter does the patch, I'll pass this along to her.
Krissy Sherman Bonning says
Thanks, Natalie! I hope it helps your friends and her little one.
MaryAnne says
And thanks for linking up to Learning Laboratory!
MaryAnne says
This is brilliant! So much more fun than the regular eye patches!
I'm sure my kids will eventually inherit Mike and my nearsightedness as well as astigmatism, but if they're like us they'll luck out until they hit their teens…
Krissy Sherman Bonning says
Yeah, we weren't so lucky. It's like Sawyer is taking right after me!
Pam says
endmyopia.org