

Disclosure: This blog post, contributed by Felicia of Princess and The Rock, contains affiliate links. As an affiliate and Amazon Associate, I earn from qualifying purchases at no additional cost to you. Please read my full disclosure policy for more information.
Obviously, kids love receiving gifts, but they love giving gifts, too. The value for them is not in the gift itself but in the excitement and suspense of the gift recipient wondering what the treasure is inside the package and unwrapping their gift.
Like you, I also try to teach my kids that it is more blessed to give than to receive. So their daddy and I receive handmade gifts and cards from them nearly daily.
We decided to embrace their excitement over gift giving and do a project painting wrapping paper to add a personal touch to the next gift they give.
A Fun Idea for Painting Wrapping Paper with Kids
Our painted wrapping paper turned out really cute, and the kids had so much fun painting it. Here’s how to make some of your own…
Supplies for Rubber Band Splatter Painting Wrapping Paper:
This painted wrapping paper technique is so easy and fun. The design on the gift wrapping paper is made with a simple splattering “airbrush” technique I learned while I was a child. And the materials needed are likely what you have at home, so you can paint your own gift wrap anytime.
To splatter paint your own wrapping paper, you’ll need…
- a large piece of white craft paper (any type of paper works, like white butcher paper or even brown kraft paper if you use dark paint)
- tape
- craft paint (tempera paints will work, but acrylic paint is better)
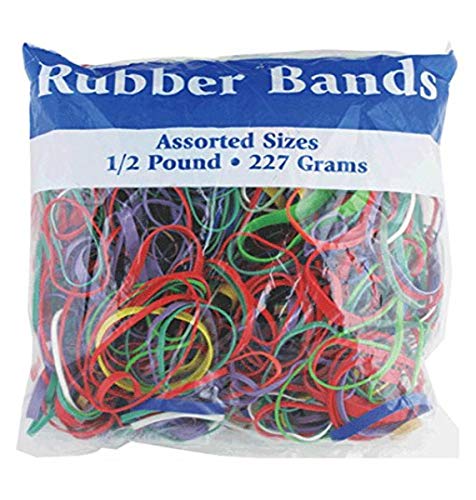
- rubber bands (using rubber bands of different sizes is ideal)
- an old plastic comb
- an old toothbrush
How to Splatter Paint Wrapping Paper:
Now, this technique can be a little messy, so you’ll want to lay out a drop cloth or use a flat surface that is washable. And, tape your white paper down with some Scotch Tape on each corner.
Then, have your child scatter rubber bands all over the paper. This doesn’t have to be perfect; it’s okay to let them overlap.
Now, it’s best to choose no more than four colors of paint. You won’t need a lot of paint, but it works best if it’s a little runny, so thin it down with some water, if necessary.
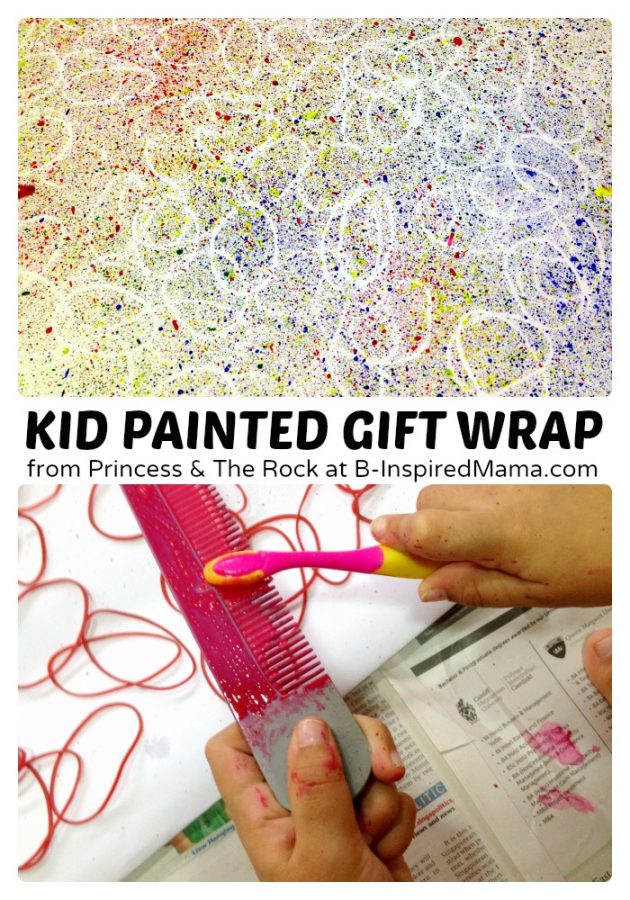
Invite your child to dip the toothbrush into a little paint. Then, have them hold the comb a few inches above the paper and brush the toothbrush bristles over the bristles of the comb. This should create tiny specks of paint on the paper that look like airbrushing.
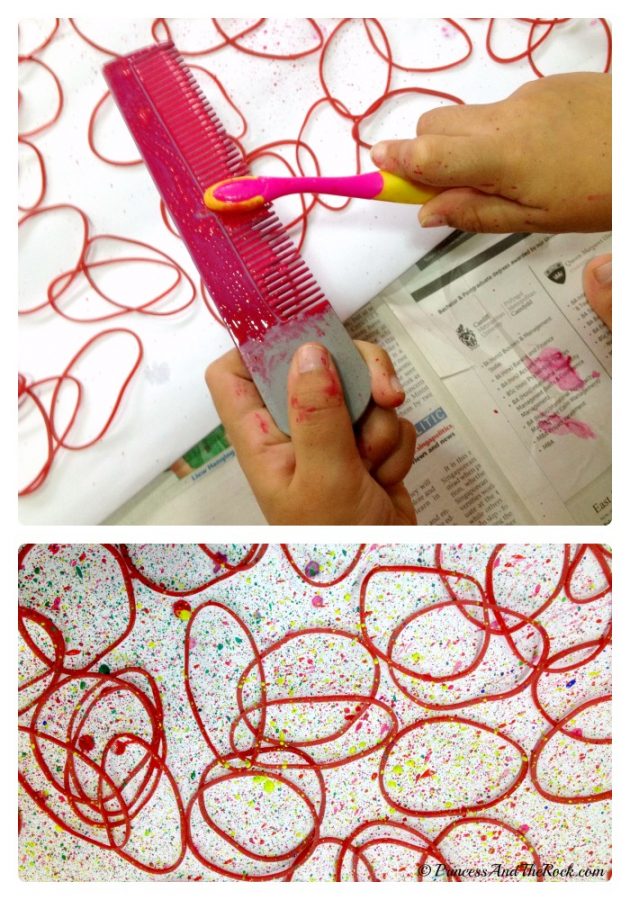
Repeat with different colors all over the paper. Encourage your child to experiment with holding the comb at varying heights above the paper and layering different colors.
When your child is satisfied with their gift wrap painting, let it dry fully before removing the rubber bands and taking the tape off the corners of your sheets of paper.
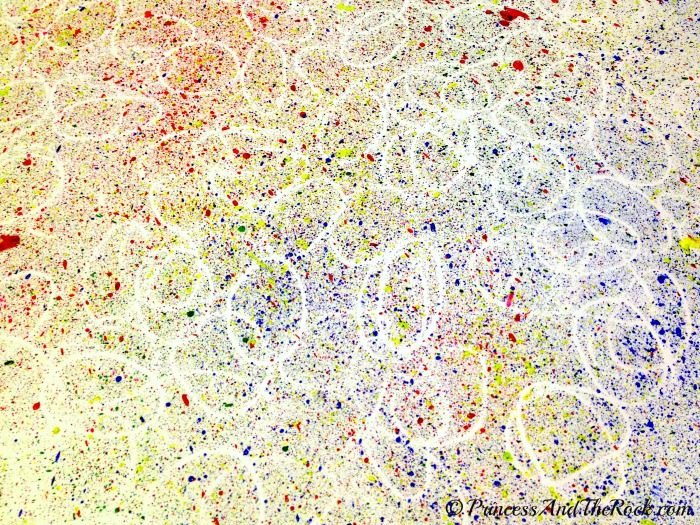
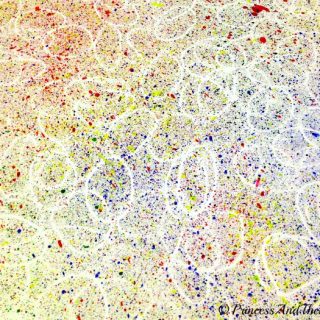
Your child will be amazed at how the rubber bands act like a stencil, leaving neat designs of white negative space all over the splatter-painted wrapping paper!
Full Rubber Band Splatter Painting Wrapping Paper Tutorial:
Rubber Band Splatter Painted Wrapping Paper
Steps
- Tape white craft paper down on a flat surface using clear tape on each corner.
- Scatter rubber bands all over the paper. (This doesn't have to be perfect; it's okay if they overlap.)
- Choose no more than four colors of acrylic paint and thin them with water, if necessary, to make them a runny consistency.
- Dip the toothbrush into paint, then hold the comb a few inches above the paper and brush the toothbrush bristles over the bristles of the comb to create tiny specks of paint on the paper that look like airbrushing.
- Repeat with different colors all over the paper, experimenting with holding the comb at varying heights above the paper and layering different colors.
- Allow painted wrapping paper to dry fully before removing rubber bands and taking the tape off the corners.
Tools and Supplies for DIY Wrapping Paper from Amazon:
Get everything you need to paint your own wrapping paper right on Amazon…
465 Multicolor Rubber BandsCrayola Acrylic Paint – Assorted Colors (6ct)Made in USA White Kraft PaperHair Combs SetAmazon Basics Clean Plus Toothbrushes


Plus, find all of our favorite art supplies in B-Inspired Mama’s Amazon Shop: Awesome Kids Art and Craft Supplies
Like this DIY Gift Wrap Idea? Save It & Save It!
Don’t forget to save this resource to come back to. And share it with friends! Simply use the buttons at the top or bottom of this post. Or, click here: Share on Facebook | Tweet It | Pin It | Email to a Friend
More Fun with Painting from B-Inspired Mama:
- Simple Pour Painted Homemade Christmas Ornaments
- A Jingle Bell Painted Art Project for Kids
- Indoor Snow Painting Fun
Maya says
I love, love, LOVE!! this idea.
i’m a pastry student in the middle of my advanced cake lab and we need to make what is called a “wrapped present cake” (meaning a cake that looks like a wrapped present). and i have been wracking my head trying to think of how to color my fondant (i am not the best painter or sketch artist so that is always a bit of a challenge for me), however thanks to you i have found my answer! this is such an easy task to do. i will probably change to bands with some other shape. but this is such a great idea.
Thank you so much!!
Krissy @ B-Inspired Mama says
Ha! So cool how you will use the technique. I’d love to hear how it goes!
Erica says
Sweet idea! Now I wish I hadn’t thrown out my sons old toothbrush the other day! He is probably too young to comprehend this idea anyway and would probably just try and brush his teeth with a paint filled brush… But still, the idea to make your own paper will make any gift just that much more personal. Thanks for sharing!
-Erica, visiting from The Kids Co-op!
Krissy @ B-Inspired Mama says
Ha – my littlest would definitely have a mouth full of paint, too!
Barb @ A Life in Balance says
I’ve never seen the comb technique before. With 5 kids, I’ve got a few extra old toothbrushes available for craft projects.
I’d love for you to share your craft project with my readers at Fabulously Frugal Thursday. Have a great week!
Janis Cox says
Love this idea. I found you at Sun Scholars. I am looking for people to link crafts and art ideas on my Saturday blog Creative Saturdays on http://www.janiscox.com
Blessings,
Janis http://www.janiscox.com Author of Tadeo Turtle