• Skip to primary navigation
  • Skip to main content
  • Skip to primary sidebar
  • Skip to footer
  • About
  • Contact
  • Subscribe to B-Inspired Mama Newsletters TODAY!
  • Privacy Policy
  • Disclosure
  • The “Fun Finds for Kids” Shop

B-Inspired Mama

Kids Crafts · Learning Fun · Family Recipes · Creative Parenting Tips

  • Home
  • Kids Crafts
    • Painting
    • Mixed Media
    • Hand Print Art
    • Art History
  • Play and Learning
    • Fine Motor Fun
    • Play Dough
    • Outdoor Play
    • Literacy & Reading
    • Math Fun
    • Science Fun
    • Sensory Play & Sensory Processing
  • Family Recipes
    • Breakfast Ideas
    • Lunch Ideas
    • Snack Ideas
    • Dinner Ideas
    • Dessert
    • Beverages
  • Creative Parenting
    • Sleep Issues
    • Picky Eaters
    • Gentle Discipline
    • Potty Training
    • Health & Safety
    • Special Needs
    • Taking Care of Mom
    • Household Management
  • Printables
    • Printable Activities for Kids
    • Coloring Pages
    • Printable Parenting Tools
    • Home & DIY Printables
Home » Arts and Crafts for Kids » Painting » Simple Easter Doily Painting

Simple Easter Doily Painting

By Krissy of B-Inspired Mama 6 Comments

Sharing is caring!

1.2Kshares
  • Share
  • Tweet
  • Yummly
  • Email

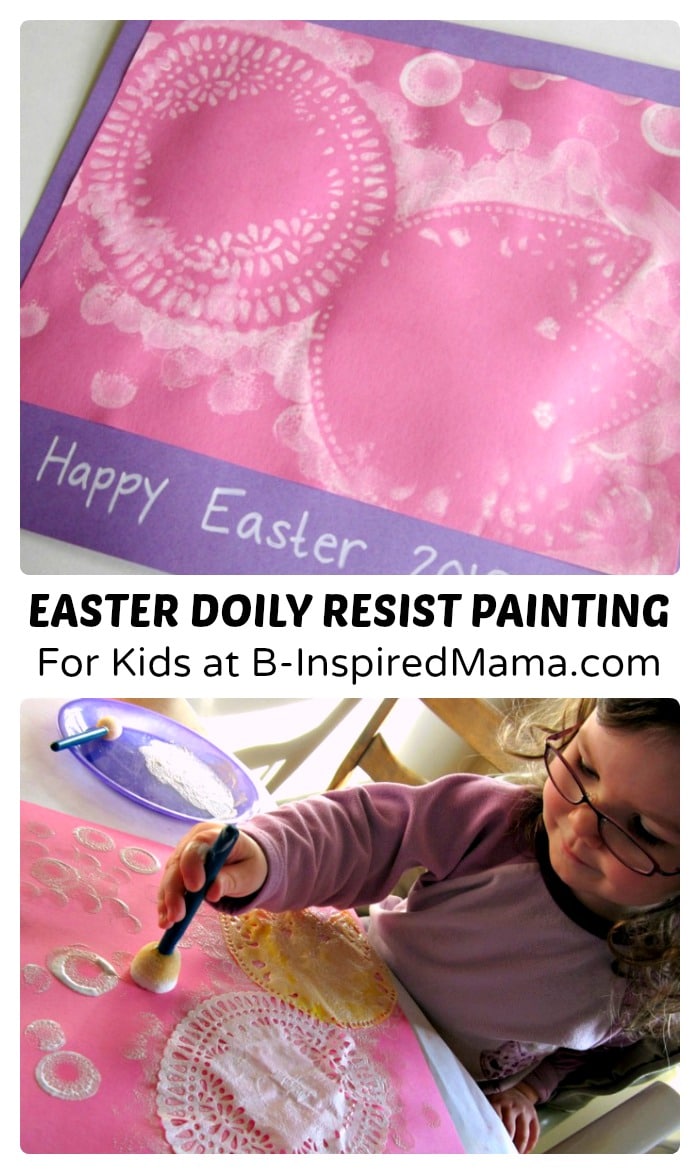
Simple Easter Painting for Kids!

When I saw these egg and flower shaped paper doilies at the dollar store, I just knew we could come up with lots of creative ways to use them.  Our favorite way: creating beautiful Easter doily paintings.  Check it out…

Simple Easter Doily Resist Painting for Kids at B-Inspired Mama

This post may have affiliate or sponsored links. Please see my disclosure policy.

Kids Easter Doily Resist Painting
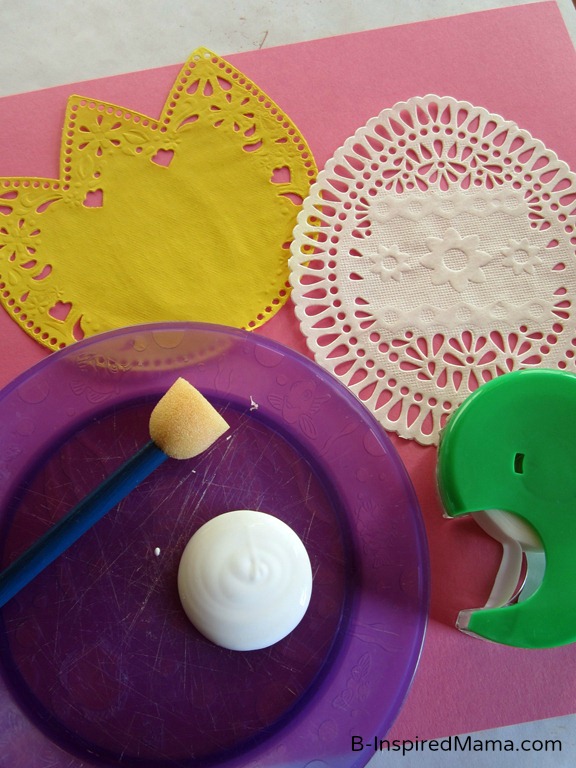
Supplies:

  • paper doilies (any shape would work, but eggs and flowers rock!)
  • colored cardstock or construction paper
  • tape
  • a sponge brush or small sponge
  • kids’ paint (any colors would do, but limiting the color palette might make a better end result)
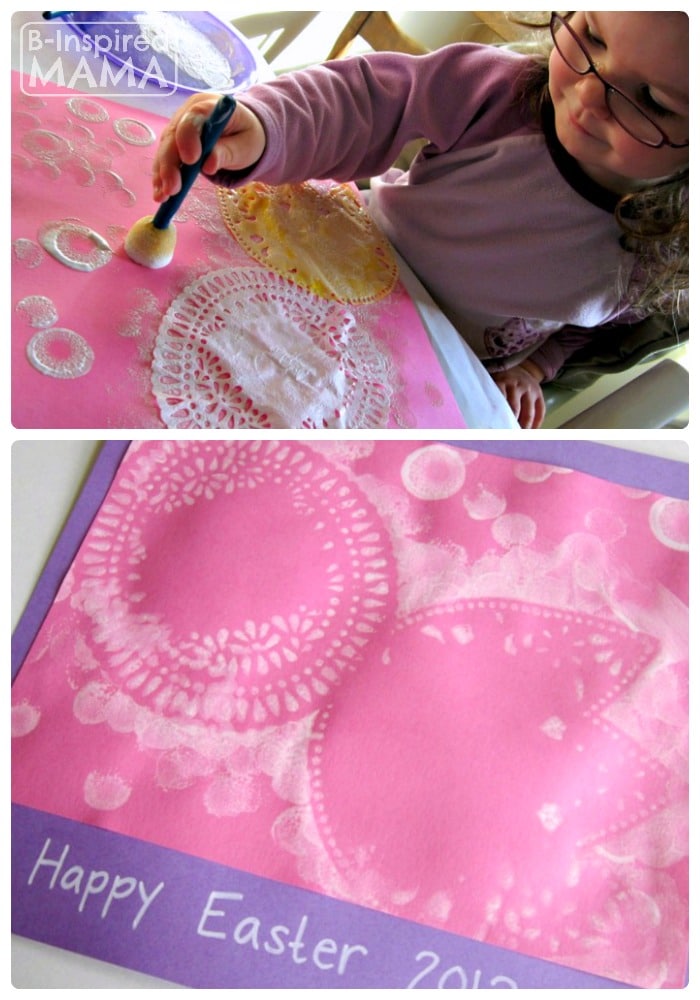
Supplies for Easter Doily Painting at B-InspiredMama.com

Steps:

  1. Use a few small tape loops on the back of your doilies to tape them down on the paper.  (They don’t need to be very sticky, because you don’t want them to rip the paper later.  So you might need to remove some of the stickiness from the tape first by pressing it onto your clothing or fingers.)
  2. Use the sponge or sponge brush to dab paint all over the doilies, making sure to cover all of the doilies and their edges.
  3. Carefully remove the doilies and WALLAH!  Simple & Beautiful Easter Art.

Simple Easter Doily Resist Painting at B-Inspired Mama

What would YOU do with these paper doilies if you had them?  I’d love to hear your thoughts in the comments below!

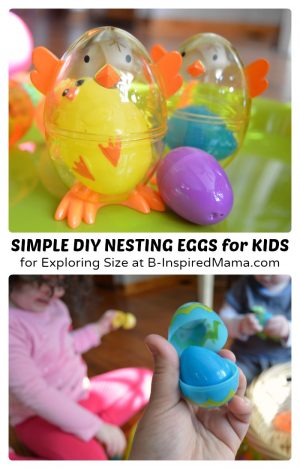
More Easter Ideas for Kids from B-Inspired Mama:

Over 30 Fun Easter Activities for Kids from The Weekly Kids Co-Op Link Party at B-Inspired Mama    Simple DIY Toys for Easter - Nesting Eggs at B-Inspired Mama

null

If you like this, get lots more by signing up to get B-Inspired Weekly right in your inbox. And follow B-Inspired Mama on Facebook, Instagram, Twitter, Google+, and Pinterest!  Also check out these link ups where B-Inspired Mama loves to share and find inspiration!
This post may have affiliate or sponsored links. Please see my disclosure policy.

Sharing is caring!

1.2Kshares
  • Share
  • Tweet
  • Yummly
  • Email

Filed Under: Arts and Crafts for Kids, Easter, Holidays, Painting, Spring Tagged With: Easter, Easter Eggs, Paper Doilies, Spring

About Krissy of B-Inspired Mama

Former M.Ed Art Teacher. Current Full-Time Blogger & Social Media Influencer. Always Crazy & Creative Mama of 3.

Previous Post: « Easter Twig Nest Activity from the Archives
Next Post: Easter Egg Ideas from The Kids Co-Op »

Reader Interactions

Comments

  1. Sugar Aunts says

    March 20, 2013 at 9:52 PM

    Super cute and pretty! Thanks for sharing at Share it Saturday!

    Reply
  2. maggy, red ted art says

    April 4, 2012 at 5:05 PM

    Very cute and so effective!

    Thanks for sharing on Kids Get Crafty!

    Maggy & Alissa

    Reply
  3. Cerys @ Rainy Day Mum says

    April 3, 2012 at 7:43 PM

    These are so pretty – Thank you so much for a different idea I hadn't thought of and sharing with everyone.

    Thank you for sharing via Tuesday Tots this week.

    Reply
  4. MaryAnne says

    April 2, 2012 at 5:59 PM

    Very pretty! We need to try this sometime – thanks for the inspiration!

    And thank you for linking up to Learning Laboratory at Mama Smiles =)

    Reply
  5. Growing a Jeweled Rose says

    March 30, 2012 at 4:35 AM

    I love this idea. We buy those doilies form The Dollar Tree too, and I never thought to do that with them. Finding you through the Kid Blogger Network. I am loving your site, and looking forward to connecting more here and through KBN! 🙂

    Reply

Leave a Reply Cancel reply

Your email address will not be published. Required fields are marked *

Rating


Primary Sidebar

  • Email
  • Facebook
  • Instagram
  • Pinterest
  • Twitter
  • YouTube
Meet Krissy of B-Inspired Mama

Footer

Follow Along on Social Media:

  • Facebook
  • Instagram
  • Pinterest
  • Twitter
  • YouTube

Browse by Category:

Browse by Date:

Disclosure: This Site is a participant in the Amazon Services LLC Associates Program and Influencer Program. As an Amazon Associate I earn from qualifying purchases (without the cost being higher for you).

Copyright © 2021 · Foodie Pro Theme by Shay Bocks · Built on the Genesis Framework · Powered by WordPress

We use cookies to make sure you get the best experience on this site. Cookies always make everything better, right?I agree!No, thanks.Privacy Policy