This post was contributed by Jamie of Hand Made Kids Art.
An Art Project Full of “STEAM”!
This kids art project combines Science, Math and Art. We love to combine these elements together for a fun STEAM project. STEAM is the combination of Science, Technology, Engineering, Art and Math. Most people are familiar with STEM, but we suggest adding the A for Art, because Art is an essential part to learning and developing creative thinking skills. Art encourages your child to think creatively and to look at the world in a different way. This project shows you how easy it can be to do easy science experiments at home.
This post may contain affiliate links. Please see my disclosure policy.
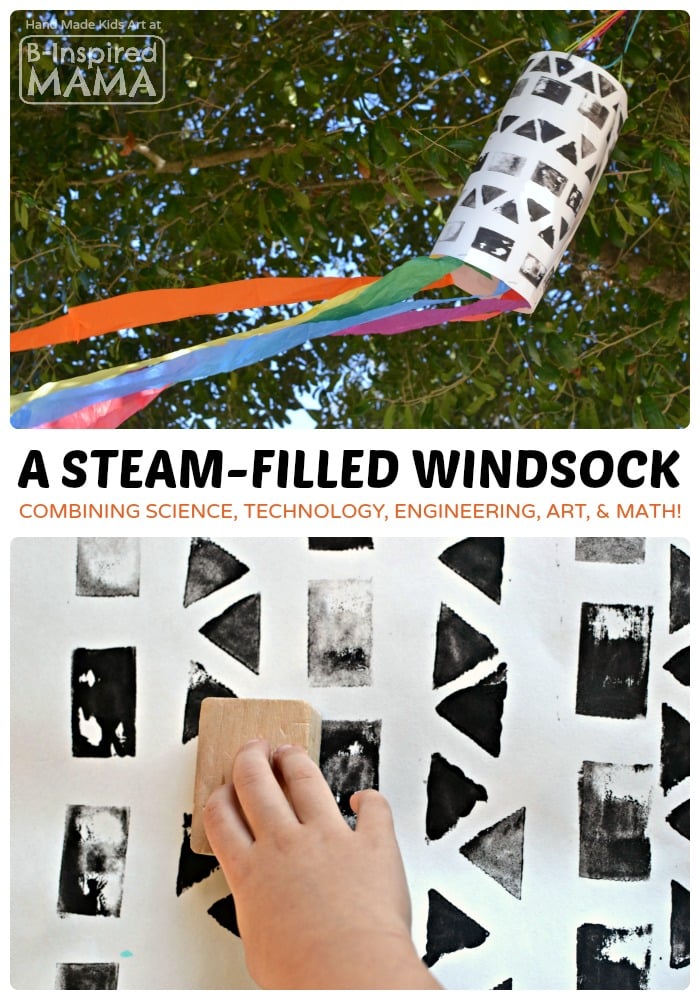
STEAM Filled Windsock Art Project
I suggest dividing this project into two sessions. For the first session, create your patterned work of art. In the second session, use the work of art to create the windsock. Regardless if you divide up the activity or complete in one afternoon, this activity is a great example of how to incorporate Art, Math and Science in your child’s learning.
Materials:
- White Posterboard 11×17
- Black Paint
- Paint Brush
- Wooden Block
- Foam Sheet
- Duct Tape
- Tissue Paper or Paper Streamers
- Stapler
- Hole Punch
- Yarn
- Pattern Art with Shapes
Creating the Patterned Paper:
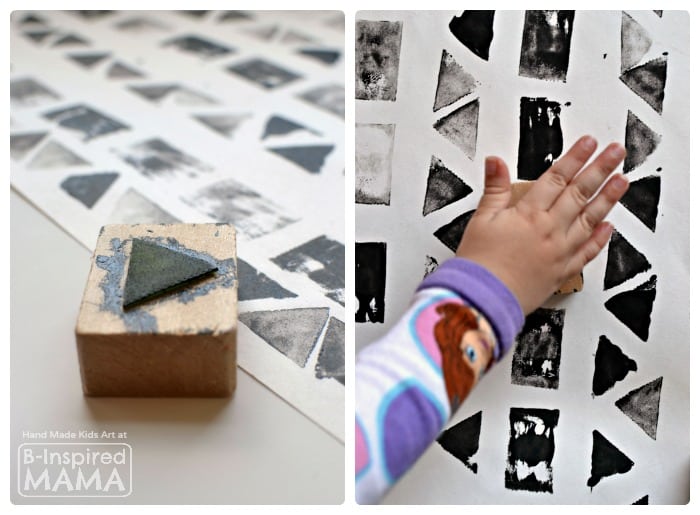
Step 1: Create your own geometric shape stamp by cutting a piece of a foam sheet into a shape. Using duct tape, adhere the shape to a wooden block.
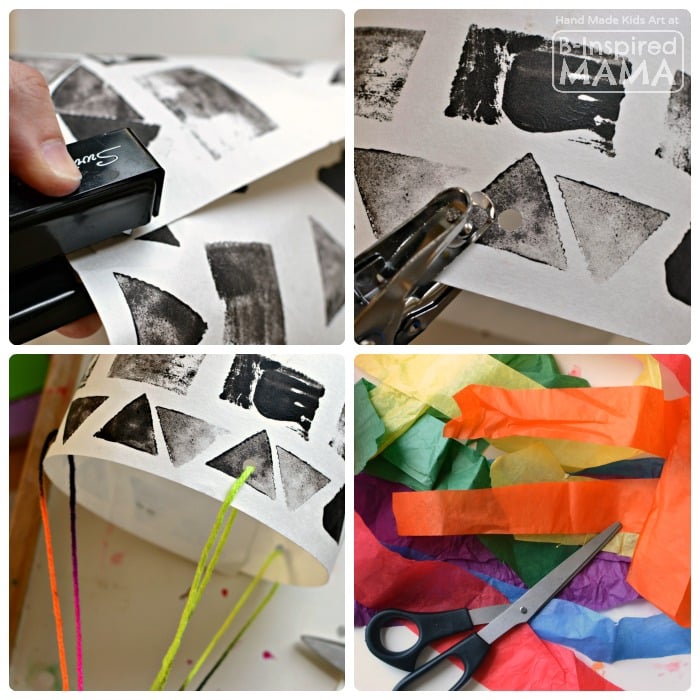
Step 2: Brush the paint on the foam shape and once the shape is covered press the foam shape down on the paper. Use different shapes to create a pattern. Let the paper dry.
Math Connection: A pattern is something that is repeated at least twice. Depending on the skill level of your child, challenge your child with creating a more complex pattern such as ABC ABC or AABB AABB with your foam shapes.
Art Connection: A relief print is a form of printmaking where the design is on a raised surface and is covered with color and stamped on another surface.
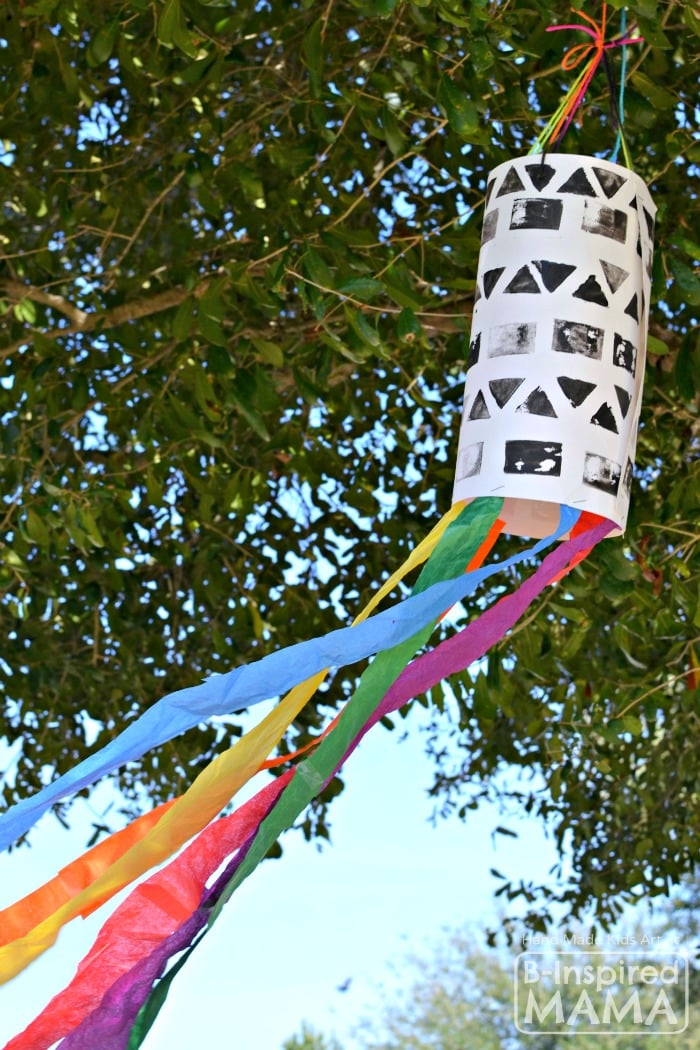
Creating the Windsock:
Step 1: Roll the patterned paper into a cylinder and staple the ends to secure it. Use the hole punch to punch three holes along the top. Cut three pieces of yarn and make a loop through each hole. Add one more piece of yarn to tie all three loops together in the center. Be sure to leave enough yarn to hang the windsock.
Step 2: Cut your tissue paper or paper streams into long vertical strips. Attach to the bottom of the windsock with staples. Hang outside and observe the wind direction.
Science Connection: To use your windsock for an easy science experiment, discuss wind with your child. What causes wind? How is it used and how does it affect the weather? Look out the window and make predictions about the wind from observations at the window. Take the windsock outside to test your prediction. Older children may use a compass to track and graph wind changes.
Art Connection: Reinforce the colors of the rainbow by using rainbow order to create your paper streamers for the windsock.
What kinds of kids art projects have your kids been doing lately? Have they ever done a STEAM activity? Share in the comments below!
More Art Projects for Kids from B-Inspired Mama:


If you like this, get lots more by signing up to get B-Inspired Weekly right in your inbox. And follow B-Inspired Mama on Facebook, Instagram, Twitter, Google+, and Pinterest! Also check out these link ups where B-Inspired Mama loves to share and find inspiration!
This post may contain affiliate links. Please see my disclosure policy.
Leave a Reply